The Pocket Cut for the lip could also be performed here provided the
Not yet tested
Tabs/Contour are strong enough or deferred with increasing difficulty/risk.
Cut SideA and SideB from woodstock using bandsaw
Remove SideA/SideB from respective sections of workstock
Align SideB and SideA in vise using wood scraps
See vise alignment.
Drill two Pin Guide holes 3/32 or .09375 through SideB and well into SideA
See centerline - drill.
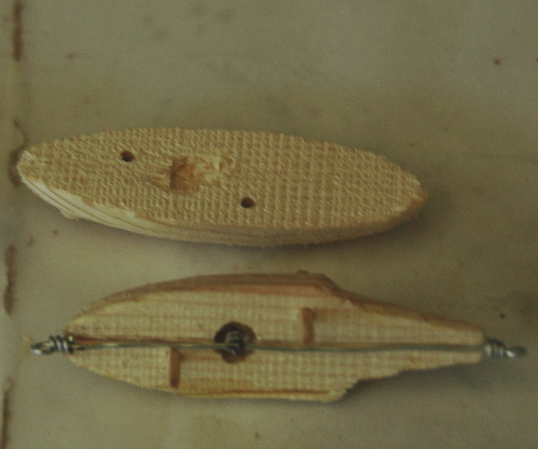
Pin SideB to SideA such that the SideB-SplitFace is on top (both SideB/A surfaces touching and SideA SplitFace is on bottom
See frontal and side views.
Secure and align in vise
Using the dremel scribe locate/verify the center line of the SideB SplitFace
{SideB} Scribe a groove along the centerline to a depth suitable for through-wire
{SideB} Using scribe point locate the center of belly hook bore hole. Raise scribe to allow install of End Mill.
{SideB} Bore a shallow hole (1/4 End Mill) at the centerline locate at the desired point for the belly-hook wire.
{SideB} Drill Belly Hook Hole to suit wire (1/16). Run drill deep into SideB but do not penetrate to SideA.
{SideB} Bore slot for lip if desired or wait until fully assembled and pond tested.
Remove both sides from vise. Separate sides and remove pins.
Then hand hold SideB and completed drilling Belly Hook Hole.
Create belly hook through wire anchor loop. The main through wire will run through the anchor loop. So keep it small.
Create a through wire and a belly wire as one subassembly.
Using both sides, the dowel pins, and subassembly through wire temporarily assemble the lure with the through wires.
Create front loop-point using 5/64 drill bit <.078125> or smaller
Create belly wire loop to through wire
Create belly-hook-loop
Create tail-hook loop
{SideA} Gentley hand ream (1/4 End Mill) any belly hook loop mating hole if needed.
The Pocket Cut for the lip could also be performed here provided particular attention is paid to adequately securing the
lure in the vise and align XYZ is obtained.
Tested using first three prototype lures. But required close attention to verification of setup.
One of three prototypes was scrapped as unacceptable.
Deferring to this point required additional sealant coating.
Pocket Cut for Lip
If Lip is to be used create a matching slot on SideB
Load Belly Outline trace, 092.99_04_021_outline_lure_SideB_Bottom_057.ngc
Setup the xy touch to focus Belly Outline trace run
With the steppers off execute the Belly Outline trace run.
Turn-on steppers
Load the Lip Pocket Cut, 100_07_973_031_057_lipCut3dPocket_boxCheck.ngc
Use a best case alignment to center Pocket Cut With the Pocket Cut centered, check the Y view.
Using a scribe execute the verification the Pocket Cut for the Lip
Execute the the Pocket Cut
Please send comments or questions using e-mail, voice telephone at 919-846-7705. (Last update: October 10, 2019 tar)
